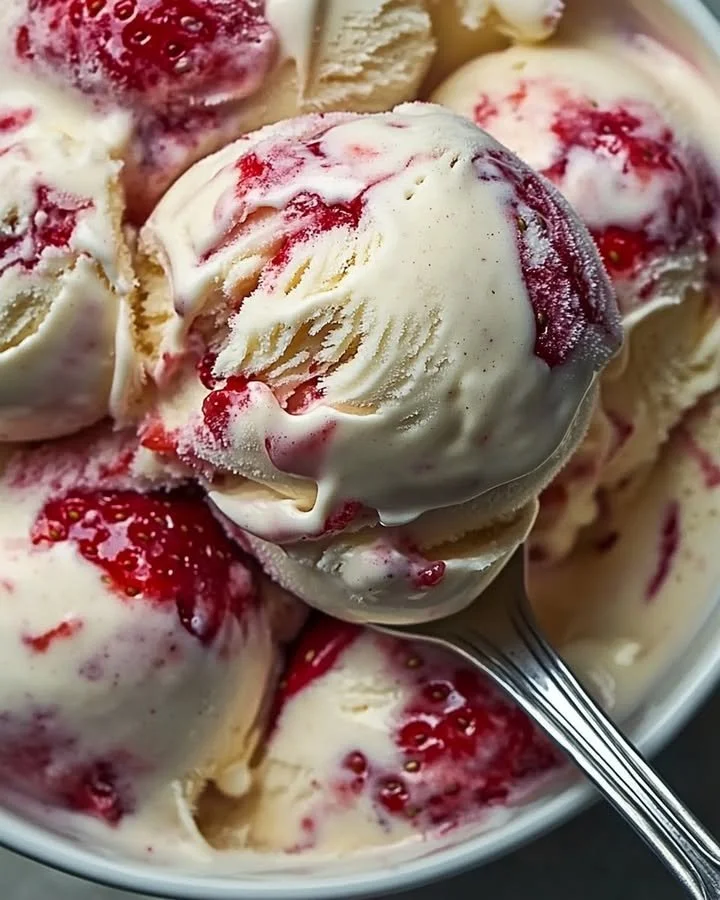
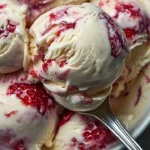
Homemade Strawberry Vanilla Bean Ice Cream
Imagine indulging in a bowl of Homemade Strawberry Vanilla Bean Ice Cream, where creamy, velvety vanilla meets the vibrant sweetness of sun-ripened strawberries. This recipe invites you into a delightful summer moment with each spoonful, showcasing the bright pink swirls of strawberry alongside the rich, aromatic essence of vanilla bean. With this step-by-step guide, you’ll be equipped to create a luscious treat that speaks to your senses, turning a hot day into a memory of joy and refreshment.
History / Fun Fact
Ice cream has been a beloved dessert for centuries, dating back to ancient civilizations that enjoyed frozen desserts made from snow and ice. The evolution of ice cream, particularly as we know it today, blossomed in 18th-century Europe, where cream and sugar were combined with flavorings. The pairing of strawberries and vanilla, however, holds special significance in North America, where strawberry picking is a cherished summer tradition. Strawberries, known as the “queen of fruits,” bring their vibrant color and sweet flavor to ice cream, making this dessert as nostalgic as it is delicious.
Ingredients
This luscious treat requires some simple yet rich ingredients:
- 2 cups heavy cream – For a luxurious and creamy texture that melts in your mouth.
- 1 cup whole milk – Adds a lightness while enhancing creaminess.
- 3/4 cup granulated sugar – The perfect balance of sweetness, enhancing flavors without overpowering.
- 1 vanilla bean (or 2 tsp vanilla extract) – Provides an aromatic essence and dainty specks of vanilla throughout.
- 4 large egg yolks – Contributes to a rich, custard base that gives ice cream its delightful texture.
- 1 1/2 cups fresh strawberries, chopped – The star of the show, offering vibrant color and refreshing taste.
- 1/4 cup granulated sugar (for strawberries) – Enhances the natural sweetness of the strawberries.
- 1 tsp lemon juice – Brightens the flavors and balances sweetness, lifting the dish beautifully.
With ingredients this aromatic and creamy, prepare yourself for an unforgettable experience!
Cooking Time & Tips For Homemade Strawberry Vanilla Bean Ice Cream
Creating this homemade ice cream can be an engaging journey, with options for quick prep or leisurely crafting. The quick method involves using an ice cream maker, resulting in a creamy texture in about 30-40 minutes. However, taking your time to create a custard-based ice cream leads to a richer flavor profile and creamier texture, fostering delicious anticipation as it chills.
Tips for success:
- Choose ripe strawberries: Opt for fresh strawberries that are firm, fragrant, and vibrant. The flavors truly shine through.
- Chill the mixer bowl: If you’re using an ice cream maker, place the mixing bowl in the freezer beforehand for a quicker freeze.
- Be patient: Give your ice cream enough time to chill as this helps the flavors meld and improve the texture.
- Taste as you go: Adjust sweetness to match your taste buds when making the strawberry swirl.
Following these tips will elevate your ice cream-making game, ensuring each scoop is heavenly!
Step-by-Step Directions
Make the Strawberry Swirl:
Start by placing 1 ½ cups of chopped fresh strawberries into a medium saucepan. Sprinkle with ¼ cup of granulated sugar and 1 teaspoon of lemon juice. Over medium heat, allow the strawberries to soften, about 10 minutes, while releasing their sweet juices. Gently mash them with a fork—don’t puree; we want some lovely texture! Once done, set the mixture aside to cool before refrigerating it.
Prepare the Ice Cream Base:
In another saucepan, pour in 1 cup of whole milk and 2 cups of heavy cream. Add half of the granulated sugar and turn the heat to low. Open up the vanilla bean, scrape the seeds into the mixture, and include the pod for extra flavor. Slowly bring your concoction to a simmer—do not boil! In a separate bowl, whisk together the egg yolks with the remaining ¾ cup of sugar until pale. Gradually pour in the warm cream mixture while whisking vigorously. Return it all to the saucepan and, over low heat, continue stirring until thickened, about 5-7 minutes, until it coats the back of a spoon. Strain the mixture through a fine mesh sieve into a bowl, cover, and chill in the fridge for at least 4 hours or overnight—this is a key step!
Churn the Ice Cream:
Once your ice cream base is chilled and ready, pour it into your ice cream maker. Churn according to the manufacturer’s instructions—usually, about 20-30 minutes. In the final moments of churning, gently fold in the chilled strawberry swirl, distributing the vibrant mixture without fully combining.
Freeze & Serve:
Transfer your freshly churned ice cream into a lidded container and freeze for at least 4 hours for a firmer texture. Once ready, scoop generous portions into bowls or cones and watch as the creamy strawberry goodness glides into place!
Serving Suggestions & Occasions
This Homemade Strawberry Vanilla Bean Ice Cream is perfect for summer cookouts, birthday parties, or any casual gathering. Serve it in elegant dessert cups drizzled with a balsamic reduction or pair with warm brownies for a comforting dessert. Add a sprig of fresh mint or a slice of fresh strawberry on top for a touch of gourmet flair. It’s also delightful sandwiched between soft cookies for a nostalgic ice cream sandwich.
Common Mistakes For Homemade Strawberry Vanilla Bean Ice Cream
- Overcooking the custard: This can lead to an unpleasant scrambled egg texture. Always maintain low heat and stir consistently.
- Not chilling properly: Skipping the chilling step before churning can result in icy ice cream rather than creamy delight.
- Neglecting to strain: Straining removes any cooked egg bits and helps ensure a smooth texture.
- Churning incorrectly: Not following your ice cream maker’s instructions may lead to an unsatisfactory result.
Avoiding these pitfalls will ensure that every batch is a delicious success!
Healthier Alternatives & Variations
There’s room for creativity with this recipe. For a lower-fat version, consider using low-fat milk and substituting half the heavy cream with Greek yogurt. Craving a twist? Try adding crushed cookies, chocolate chips, or other fruits like peaches or blueberries to your ice cream. Replace sugar with a natural sweetener like honey or agave syrup for a healthier treat. Vegan options can also be made using coconut milk, cashew cream, or almond milk with natural sweeteners for an equally delightful dairy-free treat.
FAQs
Can I use frozen strawberries?
Yes! Just thaw and drain excess liquid before using them in the recipe.What if I don’t have an ice cream maker?
You can still make this ice cream! Pour the mixture into a shallow dish and freeze, stirring every 30 minutes until it reaches your desired consistency.How long will the ice cream last in the freezer?
It’s best enjoyed within 2-3 weeks for optimal flavor and freshness.Can I substitute the vanilla bean with vanilla extract?
Absolutely! Use 2 teaspoons of vanilla extract for a simpler version without compromising flavor.What can I do with leftover egg whites?
Egg whites can be whipped into meringue, added to omelets, or used in angel food cake.Is this recipe suitable for kids?
Definitely! It’s a fun recipe to make together, and kids will love both the making and indulging.
Conclusion
This Homemade Strawberry Vanilla Bean Ice Cream is not just a recipe; it’s a celebration of flavor, summer, and joyous moments with loved ones. The creamy texture and fruity flare will have you scooping seconds in no time! So why wait? Gather your ingredients, embrace the journey of creation, and treat yourself to this delightful indulgence today. Let each scoop take you on a sensory adventure, one that fills your heart with warmth and happiness!
Homemade Strawberry Vanilla Bean Ice Cream
Ingredients
Ice Cream Base
- 2 cups heavy cream For a luxurious and creamy texture.
- 1 cup whole milk Adds a lightness while enhancing creaminess.
- 3/4 cup granulated sugar The perfect balance of sweetness.
- 1 bean vanilla bean For aromatic essence and specks of vanilla.
- 4 large egg yolks Contributes to a rich custard base.
Strawberry Swirl
- 1 1/2 cups fresh strawberries, chopped Offers vibrant color and refreshing taste.
- 1/4 cup granulated sugar Enhances the sweetness of strawberries.
- 1 tsp lemon juice Brightens the flavors.
Instructions
Make the Strawberry Swirl
- In a medium saucepan, place 1 ½ cups of chopped strawberries, ¼ cup of granulated sugar, and 1 teaspoon of lemon juice. Heat over medium for about 10 minutes, gently mashing with a fork, then set aside to cool.
Prepare the Ice Cream Base
- In another saucepan, combine 1 cup of whole milk, 2 cups of heavy cream, and half of the granulated sugar over low heat. Add the split vanilla bean and seeds, and slowly bring to a simmer, stirring occasionally.
- In a separate bowl, whisk together the egg yolks with the remaining ¾ cup of sugar until pale. Gradually pour in the warm cream mixture while whisking continuously.
- Return the mixture to the saucepan and heat over low, stirring until thickened, about 5-7 minutes. Strain through a fine mesh sieve into a bowl and chill in the fridge for at least 4 hours.
Churn the Ice Cream
- Once the base is chilled, pour it into an ice cream maker and churn according to the manufacturer's instructions, typically about 20-30 minutes.
- In the final moments of churning, gently fold in the chilled strawberry mixture.
Freeze & Serve
- Transfer the churned ice cream to a lidded container and freeze for at least 4 hours before serving.
- Scoop into bowls or cones and enjoy!