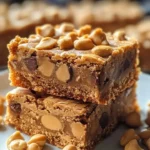
Peanut Butter Lunch Lady Cookie Bars
These soft and chewy Peanut Butter Lunch Lady Cookie Bars are a nostalgic treat that combines creamy peanut butter and rich chocolate chips for a delightful experience.
Servings: 12 bars
Calories: 250kcal
Ingredients
Cookie Base
- 1 cup unsalted butter, melted This creamy foundation adds richness and depth.
- 1 cup granulated sugar Provides sweetness that balances the nutty flavors.
- 1 cup brown sugar Adds a hint of caramel flavor and chewiness.
- 2 large eggs Bind the ingredients while contributing to the soft texture.
- 1 teaspoon vanilla extract Enhances the overall flavor.
- 1 cup creamy peanut butter The star ingredient that brings rich flavor.
- 2 cups all-purpose flour Provides structure for the cookie bars.
- 1 teaspoon baking powder Ensures the bars rise perfectly.
- 1/2 teaspoon salt Brings out the flavors.
- 1 cup chocolate chips Provides gooey richness.
- 1 cup peanut butter chips Adds additional creamy peanut butter flavor.
Instructions
Preparation
- Preheat your oven to 350°F (175°C) and grease a 9×13-inch baking pan.
- In a large mixing bowl, combine the melted butter, granulated sugar, and brown sugar. Stir until smooth.
- Add the eggs and vanilla extract, mixing until well blended to create a glossy batter.
- Gently stir in the creamy peanut butter until incorporated.
- Gradually add the flour, baking powder, and salt, mixing until just combined.
- Fold in the chocolate chips and peanut butter chips until evenly distributed.
- Pour the cookie dough into the prepared baking pan and spread evenly.
Baking
- Bake for 25-30 minutes, or until the top is golden brown and the center is set to the touch.
- Allow the bars to cool completely in the pan before cutting into squares.
Notes
For best results, measure ingredients carefully and allow for cooling time before slicing. Feel free to customize with additional mix-ins like nuts or dried fruits.